
# 1
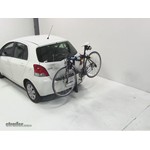
Thule Passage Trunk Bike Rack for 2 Bikes - Hanging Style
 Pontiac Trans Sport Van
The Thule Passage Trunk Bike Rake for 2 bikes is a good product. I used it to transport my mountain e-bike. I choose this particular unit because it can handle the weight 2 of bikes (non-e-bikes) and the weight of my e-bike is equivalent to weight of 2 bikes. Note: Must readjust the straps after mounting the bike to the rake.
great! works really well, and a lot easier to attach than I anticipated. We drove with bikes across the country from south west all the way to North east. solid rack!
# 2
Thule Passage 3 Bike Carrier - Trunk Mount
Way too light duty for what is advertised. It seemed to be made out of 1/2 inch electrical conduit. I would never put three bikes on that rack. I only had two bikes on the rack. While on trip through Idaho the wind was so strong that one of the bikes partially blew off the rack. We traveled 1,800 miles and upon arriving home I actually sawed the bike rack up and threw it away so that no one else would use it and cause an accident. I've already found a different brand that is HEAVY DUTY and I will stick with that brand.
This is definitely more of a 2 bike carrier vs 3 bikes. I had to take the front wheels off two bikes to get three bikes on this carrier. Also, it rubbed the paint off on the trunk of my Subaru legacy.
# 3
Saris Bones 2 Bike Rack - Trunk Mount - Adjustable Arms
So far really great! I love the stability my bike has on the rack, fit for my 2021 Honda Civic, and the quality of the material engineered into the design to prevent damage to the cars paint/parts.
Works great even using an electric bike like my Aventon Soltera.
# 4
Hollywood Racks Trail Rider Bike Rack for 2 Bikes - 1-1/4" and 2" Hitches - Frame Mount
I looked at a LOT of bike racks, but when I saw the product video for this Hollywood rack and it was holding the bikes rock solid, no loose bouncing anywhere, I decided to try it and I haven't been disappointed yet. It is solid in the mount, it holds the bikes securely and the locking bars are a good deterrent to anyone wanting a quick steal. I don't leave mine on the car all the time, but so far in the weather here in Florida, it's holding up nicely. Add all this to the great price and customer service from etrailer.com and it's a big win for the average consumer. Thanks, etrailer!
I like it a lot! I think it has solved my issue with having in easy, yet stable way to haul my bike on my 2012 Honda accord coupe. It's only been one day, so I can't speak about the durability. But it's definitely use a friendly and sturdy.
# 5
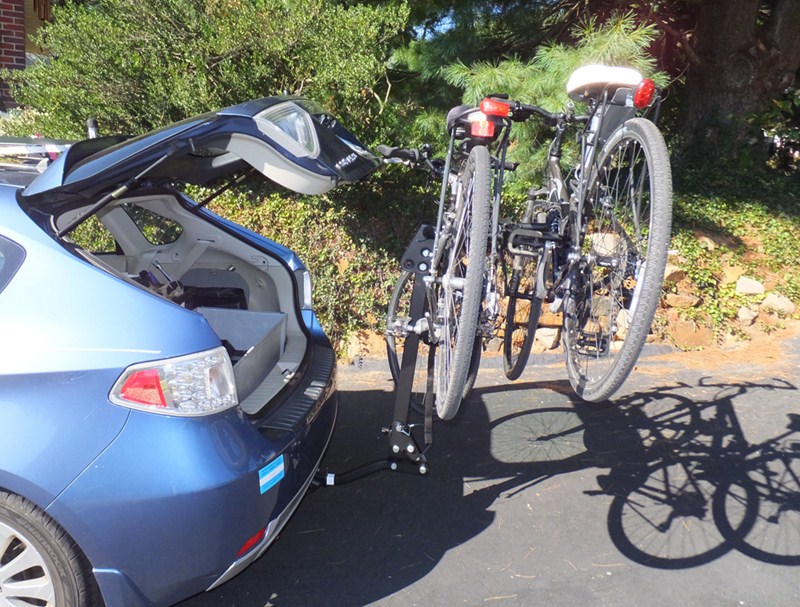
Swagman Trailhead Bike Rack for 3 Bikes - 1-1/4" and 2" Hitches - Tilting
My previous bike rack was a hitch mounted Yakima. It was sturdy but not well suited for my low Subaru Impreza. It stuck out too far and hung too low so that I had to inch my way down the driveway or over speed bumps for fear of it bottoming out. A roof rack or a rear window mounted rack was not suitable since I wanted to be able to also carry two kayaks. First, I tried to modify my rack by shortening the part that sticks out of the hitch. I tried to saw off about 6 inches so it wouldn't stick out so far but the steel was much too hard. I ended up ruining several metal-cutting blades on my power saw before I gave up. I looked for other rack options. There weren't many out there. But eventually, I found something that met my needs. I purchased the "Swagman Trailhead 3 Bike Fold Down Bicycle Hitch Rack" in 2013 from eTrailer.com. The part that enters the hitch curves up to increase clearance from the ground. It is sturdy and sticks out far enough so I can still open my trunk hatch without having to lower the main vertical bar on the hitch (though I could if I wanted to). It isn't often I am really excited about a piece of gear but this hitch rack has made me worry-free when I transport my bicycle(s) via car. The only thing I don't like is that it is advertised as being a 3 bike carrier but it only fits 2 hybrid bikes. Maybe it will fit 3 skinny racing bikes but for the average rider, don't expect to fit on more than 2. But my experience is that is the case for all bicycle racks.
Nice heavy duty rack. Putting it together is quite simple if you read the instructions. I like the ability to use both a 2" or 1 1/4" receiver. etrailer is very easy to deal with.
# 6
Swagman Chinook Bike Rack for 2 Bikes - 1-1/4" and 2" Hitches - Frame Mount
Works for my fat tire bike. Once it's set up, it's easy to install and remove. I had to cut out some of the plastic cladding on the underside of my bumper on my 2014 Subaru Outback. Good value. I've had no issues.
GI love the Rack, it is easy for me to handle, (as a 89 yearold rider.), two bikes ride and fit very nicely. Like how it folds down,and how it folds to open the tailgate . Great quality for the money, I would highly recommend this rack
# 7
Curt 2 Bike Platform Rack - 1-1/4" and 2" Hitches - Frame Mount - Tilting
I installed this rack onto a Curt trailer hitch which is mounted onto a 2017 Honda Fit. I have been using it intermittently for several months, probably about 5 times with one bike and twice with two bikes. I give some pros and cons below and then elaborate. Pros: easy to assemble, easy to mount and dismount bikes, easy to lock and unlock, how to put the rack into different positions is intuitive Cons: inconvenient to put the rack into different positions, inconvenient to mount the rack onto the hitch, rack protrudes about 15 inches from bumper when in flipped up position (seems very vulnerable to someone backing into it in a parking lot, very inelegant looking I say the repositioning is intuitive because there is really only one way you could possibly place the pins for each position. But removing and replacing two pins is much less convenient than turning a knob or a lever, like some racks do. Also many racks fold and flip in such a way as to look very unobtrusive when in non-use mode. This one looks like kind of a monstrosity. That does not really bother me but it might bother some owners. The part that does bother me is how far it protrudes from the car. I back into parking spaces whenever possible to avoid someone bumping into the rack and damaging it (which happened to a friend). My number one suggestion for Curt is related to mounting the rack onto the hitch. Make it easier to tell when the holes are lined up so that the bolt/pin will fit and thread. As it is now, if you insert the rack as far as it can go it is way too far in. Ideally, it would be exactly lined up. Failing that, maybe some kind of click or other feedback to know at least that you are in the neighborhood. It would also be great to have an attaching device that is easier to fasten and unfasten than is the bolt/pin. Tip for mounting the rack onto the hitch: I assumed that it would be awkward to hold, what is it 46 pounds?, while trying to line up the rack probe with the receiver. If you have a garage with exposed collar ties, my solution could work well for you. I looped a cargo strap over a collar tie. Then I hooked both hooks of a bungie onto that loop. The idea is that you hook one of the bike frame holders of the rack onto the bungie, suspending the rack a few inches off the garage floor. This takes most of the weight of the rack so that you can just pull up or down and forward until you line up with the receiver. Tip for mounting bikes. Don't put the little screw into the post that prevents you from completely removing the bike frame holders. Remove both holders. Position the first bike, slide the holder into place, position the second bike, slide the holder into place. I found this makes it much easier, because you avoid parts of the bike hitting the holder as you are trying to get the wheels into place. The trick is that if you are mounting only one bike, don't forget to put the second holder back on - or maybe just stick it inside the car right away.
Have used mine several times in the past 2 years on the back of a ‘21 Honda Pilot and a ‘19 Ram 1500 Classic. I really like that the platform will tilt downward allowing the Pilot rear hatch to open with no interference. The tailgate on the Ram doesnt open fully even with the platform tilted downward, but that is a Ram problem & not a Curt problem. Was well worth the money.
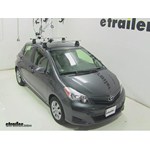
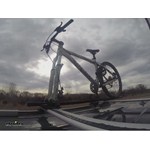
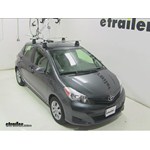
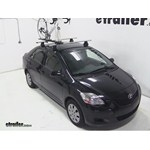
Does the Yakima FrontLoader Wheel Mount Bike Carrier Suit Your 2014 Toyota Yaris

Today on our 2014 Toyota Yaris, we're going to be test fitting the Yakima Front Loader. A wheel mount roof bike rack with part number Y02103. With our Yakima Q Towers Roof Rack System already installed on the Yaris, we'll begin out test fit by placing our bike rack directly onto our cross bars. Here at the front we'll want the two outside arms of our clamp to be in front of our cross bar and the single middle arm to be behind it. We'll then tighten the black T handle to secure the front clamp to our rack. With our front secure we'll now move to the rear. Here we're going to loosen the small black T handle, remove the T bolt from the slot, bring the clamp around our bar, reinsert the T bolt and tighten it down with that same black T handle. With that T handle tight, our rack's secured to our vehicle.
Fit Test: Yakima ForkLift Roof Mounted Bike Carrier on a 2014 Toyota Yaris

Today on our 2014 Toyota Auris, we're going to be test fitting the Yakima Forklift. A fork mount roof bike rack with part number Y02098. With our Yakima Q Towers roof rack system already installed on the Auris, we're going to begin our test fit by placing the bike rack directly onto the cross bars. At the front, we're going to remove our skewar, slide back the black plastic cover and loosen the T-handle. This will allow us to remove the T-bolt from the slide. Bring the clamp around the under side of the bar. We'll then reinsert our T-bolt and tighten that black T-handle back down. With the front secure, we'll slide our black plastic cover forward and replace our skewar. We can then move to the rear.
Thule Sprint Fork Mount Bike Rack Review - 2014 Toyota Yaris
Today on our 2014 Toyota Yaris, we're going to be test fitting the Thule Sprint. A fork mount roof bike rack with part number TH528. With our Thule Rapid Traverse Roof Rack System already installed on our Yaris, we'll begin our test fit by placing our bike rack directly onto our load bars. Here at the front we'll bring the black rubber coated metal strap around the underside of our load bar, fit it under the head of our carrier, and tighten the small black lever on the backside to secure it. With this secure, we'll now move to the rear. Again, we're going to bring the black rubber coated metal strap around the underside, fit it into the foot of the carrier, and tighten it down with the small black lever located on the front. With both of these tied, our rack is secured to our vehicle. It's now time to load up our bike.
Fit Verified: Swagman Fork Down Roof Mounted Bike Carrier on a 2014 Toyota Yaris
Today on our 2014 Toyota Yaris, were going to be test fitting the Swagman Fork Down, a fork mount roof bike rack with part number S64710. With our Thule rapid traverse roof rack system already installed on the Yaris, well begin our test fit by placing our bike rack directly onto our load bars. Here at the front, were going to bring two of the U-bolts around the underside of our load bar, fit them up through the head of our carrier, and secure them place with two wing nuts on each one. Well then tighten down all four wing nuts and secure the front of our rack to our bar. Well now move to the rear. Here well bring the U-bolt through the rack, being sure that the threaded portion comes out on both sides of the load bar.Well then put on the black metal plate and hold it in place with two of the wing nuts.
RockyMounts TieRod Stretch Roof Bike Rack Review - 2014 Toyota Yaris
Today on our 2014 Toyota Yaris, we're going to be test fitting the RockyMounts TieRod Stretch, a fork-mount roof bike rack with part number RKY1011. With our Thule Rapid Traverse Roof Rack System already installed on the Yaris, we'll begin our test fit by placing our bike rack directly onto our load bars. Here at the front we'll bring the two black rubber coated metal straps around the underside of our load bar, remove the black plastic cover, and fit them into the head of the carrier. We'll then use an Allen key to tighten the Allen bolt until both straps are secure. With the front tight, we'll now move to the rear. Here we'll remove one of the Allen bolts, bring the lower portion of our clamp around the underside of our load bar, reinsert the Allen bolt, and tighten both Allen bolts down. As you can see, the TieRod Stretch does interfere with the hatch when opening.
Does the Kuat Trio Roof Bike Rack Suit Your 2014 Toyota Yaris

Today on our 2014 Toyota Yaris, we're going to be test fitting the Kuat Trio, a fork-mount roof bike rack, with part number RU01. With our Thule Rapid Traverse Roof Rack System already installed on the Yaris, we're going to begin our test fit by placing the bike rack directly on to our load bars. Here at the front we'll bring the two black rubber coated u-bolts around the underside of our load bar, fit them through the head of the carrier, and thread two cylinder nuts onto each u-bolt. We'll then take the supplied Allen tool and tighten all four of these down. With the front secure, we'll move to the rear. We'll loosen up both wing nuts and remove one completely. We'll bring the lower portion of our clamp around the underside of our load bar, reinsert the bolt through it, and attach our wing nut.
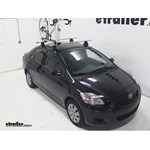
Mount: Yakima ForkLift Roof Mounted Bike Carrier on a 2012 Toyota Yaris

Today on our 2012 Toyota Yaris, we'll be test fitting the Yakima Forklift roof-mounted bike carrier, part number Y02098. With the Yakima roof rack system assembled onto our vehicle, we'll begin by placing our bike carrier directly onto our crossbars. For easier installation, I already removed the skewer, so all we have to do is fit the front clamp around our front crossbar. We'll drop the T bolt through the clamp and tighten it. Then we'll slide the black bracket around the T bolt, and install our skewer, which will hold it all together. With that secured, we'll move to the rear of the carrier, where we'll bring the rear clamp around our rear bar, drop our T bolt into the clamp, making sure our T bolt is through the clamp, and then we'll tighten the bolt.
Thule Domestique Roof Bike Rack Review - 2012 Toyota Yaris
Today on our 2012 Toyota Yaris we will be test fitting the Tule Domestique Fork Mounted Bike Carrier; part number TH513. With a Tule Aeroblade Roof Rack system assembled on to our vehicle, we will begin the test fit by placing our carrier directly on to our load bars. We'll move back to the front making sure that our bolts are through our clamp, and then we will tighten using an Allen key. Once we have that tightened secured we will move to the rear, feed the bolt through our clamp, and tighten the clamp down using an Allen key. We will go ahead and reinstall our skewer at the front part of our carrier leaving it open for when we are ready to load our bike. We will go ahead and undo the rear wheel strap, grab our bike, place it onto the wheel tray and drop our front forks down into our skewer.
Installing the Swagman Fork Down Roof Mounted Bike Carrier on your 2012 Toyota Yaris
Today on our 2012 Toyota Yaris we will be test fitting the Fork Style Roof Mounted Bike Carrier from Swagman; part number S64710. With a Tule Aeroblade Roof Rack system assembled on to our vehicle, we will begin our test fit by placing our carrier directly on to our load bars. Once we have it situated we'll take the U-bolts at the front of the carrier, feed them underneath the load bar through the flat platform, and tighten with wing nuts. We will do this on both sides at the front part of the carrier. Then we'll move to the rear, feeding the U-bolt through the top of the carrier and over our load bar. Then we will take our black bracket, put our U-bolts through, and tighten with wing nuts.
RockyMounts TieRod Stretch Roof Bike Rack Review - 2012 Toyota Yaris

Today on our 2012 Toyota Yaris we will be test fitting Rocky Mounts TieRod Stretch Roof Mounted Bike Carrier; part number RKY1011. With a Tule Aeroblade Roof Rack system mounted on to our vehicle, we will begin our test fit by placing our carrier directly on to our load bars. We will bring the rubber coated steel straps around our front load bar, remove the cover on the front, and feed it into the holders. We'll then use an Allen key to tighten the bolt, which will tighten our straps. Once we have those tight, we can go ahead and reinstall our cover. Then we will move to the rear and bring our rear clamp around our rear load bar, feed the bolts through, and tighten with an Allen key.
Rhode Gear Highway Hitch Bike Rack Review - 2012 Toyota Yaris
Today on our 2012 Toyota Yaris we're going to do a test fit of the Rhode Gear Highway 2 bike carrier part number RG8015200. This bike carrier will fit 2" and 1-1/4" hitches. We've already remove the 2-inch adaptor so that we can install it our 1-1/4" hitch. All right, we'll begin by installing the bike rack under the car inserting the shank of the bike rack into the 1-1/4" receiver tube on our hitch. We'll line up the hitch grim holes and then install our anti-rattle bolt, tighten it down and our safety clip. All right, with the anti-rattle bolt tighten down our safety clip install.
Thule Doubletrack Hitch Bike Rack Review - 2012 Toyota Yaris

Today on our 2012 Toyota Yaris, were going to do a test fit of the Thule Double Track Platform Style Bike Carrier, part number TH990XT. This bike carrier is equipped to install on a 2-inch or 1-1/4-inch hitch. With our bike rack already pre-assembled, we removed the 2-inch sleeve so that we can install it on our 1-1/4-inch hitch. Well begin by installing the shank of the bike rack into the 1-1/4-inch hitch on the vehicle lining up the hitch pin hole. Then we can install our anti-rattle bolt and tighten it down and securing it with our safety clip. This is what our bike rack will look like when its in its stored position installed on the vehicle.
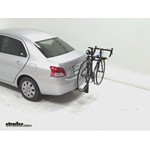
Thule Vertex 4 Hitch Bike Rack Review - 2009 Toyota Yaris
All right today on this 2009 Toyota Yaris, were going to do a test fit for part number TH9029 from Thule, the Vertex 4 Bike Carrier. A few quick notes about this bike rack is that well work of inch and a quarter receiver hitches both class one and class two, however if its class one application youre only limited to two bikes only. And this also work with two inches receiver hitches with the included spacer. Well start off our test fit by installing the bike rack into the hitch. Well install the anti-rattle bolt and tighten it down. Okay with the bike rack installed, well go ahead and give you some measurements that will give you an idea for clearance between the bicycle rack and the bumper and ground clearance.
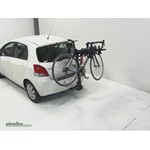
Thule Doubletrack Hitch Bike Rack Review - 2009 Toyota Yaris

Today on this 2009 Toyota Yaris we're going to do a test fit of product number TH990XT from Thule. This is the Doubletrack Platform-Style Bike Rack. Couple quick notes about this bicycle rack is it will work with 1-1/4 inch receiver hitches both class 1 and class 2. This will also work with 2-inch receiver hitches with the included spacer. We'll go ahead and start off our test fit by installing the bike rack into the hitch. We'll install the anti-rattle bolt and then lock on the other side.
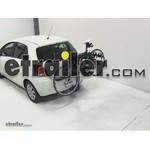
Fit Check: Swagman Titan Bike Rack for 2 Bikes on a 2009 Toyota Yaris
Alright, today on our 2009 Toyota Yaris, we're going to do a test fit of product number S63410 from Swagman. This is our Titan 4 Bicycle Rack. A few quick notes about this bike rack, that it will work from 1-1/4 inch receiver hitches both class 1 and class 2. However only on class 1, you can only load up to two bikes. Now, this will also work in a class 3 application or 2-inch receivers which includes a spacer. In this case, we're working with a class 1 receiver hitch.
Rhode Gear Highway Hitch Bike Rack Review - 2009 Toyota Yaris
Alright, today, on a 2009 Toyota Yaris, we're going to do a test fit of product number RG8015220 from Rhode Gear. This is our Highway 2 Bike Carrier. A couple of quick notes about this bicycle rack, it has a well worked up inch and a quarter receiver hitches, bolt class 1 and class 2, and also work with two-inch receiver hitches which include spacer. We're going ahead and start test fit by installing the bike rack into the hitch, and then we'll go ahead and install our anti-rattle bolt and put the safety pin on the other side. Alright, next, we'll give you some measurements. I'll give you an idea of clearance between the bicycle rack and the car and the ground.


What our customers are saying:
"Just used my new combo bike rack/trailer hitch and it worked great! Actually towed a little smoother then just the plain hitch I had before and the bike rack part is very sturdy and stable - products arrived in a timely manner and packaged well - bravo!"